Temple Mine: Difference between revisions
Streetclaw (talk | contribs) (→Treasures: update) |
|||
| Line 298: | Line 298: | ||
== Other Notable Information == | == Other Notable Information == | ||
It is possible to lose the race against [[Emilie]] if you | It is possible to lose the race against [[Emilie]] if you take longer than 90 minutes. | ||
[[Category:Location]] | [[Category:Location]] | ||
Revision as of 10:16, 25 November 2018
The Temple Mine, also known as the Abandoned Crystal Mine, Bergen Mine, Bergen Temple Mine or Cold Dungeon, is a Location in CrossWorlds. It is a mine that was abandoned when it broke into an Ancients' temple, and the temple's defense mechanisms turned the mining robots hostile. It is the second dungeon in the game, after the Rhombus Dungeon, and the first step on the Track of the Ancients. This is where players obtain the Heat element, as well as the ![]() Thief's Key, allowing them to open Bronze Chests.
Thief's Key, allowing them to open Bronze Chests.
| Bergen Mine |
|---|
|
Before it was decided to use Operation Trackwalker to find out more about the Ancients, the Temple Mine was actually a mine farmed for its precious resources. |
| -Encyclopedia entry |
| Temple Mine |
|---|
|
The Temple Mine is a Dungeon which holds the first element of the Track of the Ancients. From here, a Seeker can obtain Heat. |
| -Encyclopedia entry |
Layout
The mine has five floors that are generally progressed through from top to bottom. However, the mine has many loops and dead-end pathways, and progression through it generally involves a lot of backtracking. The path to complete the mine is as follows:
- On floor GF, complete the east rooms and find the Mine Key.
- Unlock the west rooms and complete them to unlock the elevator to floor U1.
- On floor U1, complete the south rooms and find the Mine Key.
- Unlock the north rooms. Proceed across the Great Chasm, collecting and using a Mine Key on the way, and unlock the elevator to floors U2 and U3.
- In any order, complete the U2 south rooms, the U3 west rooms and the U3 east rooms, collecting a mine key from each.
- Unlock the U3 north rooms and defeat the Infected Digmo mid-boss, obtaining the Heat element.
- With the Heat element, the U2 west rooms are now accessible. Follow the path back to the Great Chasm on U1, cross it and unlock the elevator to floor U4.
- On U4, complete the east and west rooms, collecting four Mine Keys and destroying the Stone Walls blocking the path north.
- Enter the U4 north rooms, using all four Mine Keys to progress, and defeat the swarm of Fleazers to obtain the Mine Master Key.
- Back on floor GF, use the Mine Master Key to unlock the path north to the boss.
Connecting Regions
Maps
Monsters
| Name | Locations | |
|---|---|---|
| Carritrich |
| |
| Kamikatze |
| |
| Fleazer |
| |
| Digmo |
| |
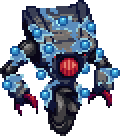
| Infected Digmo (Boss) |
| |
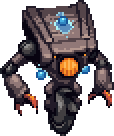
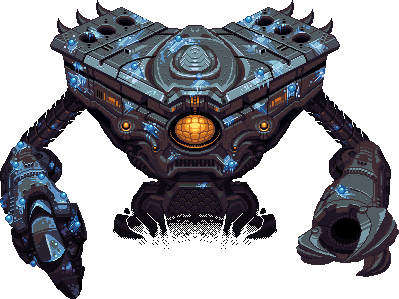
| X01 Driller H.F.S. (Boss) |
|
Destroyable Items
The Temple Mine is unusual in that it's the only dungeon to contain Botanics. The Botanics found here, Egg Pots, are themselves unique as they are the only Botanics that can spawn enemies. Certain Egg Pots, although physically identical to normal ones, have a 20% chance of spawning a Fleazer when destroyed. Generally, the Fleazer egg pots are found in areas reached after the mid-boss, with a few exceptions: Frozen Chamber 2 and Infested Chamber have standard Egg Pots to avoid complicating the major battles there, and Overrun Chamber, immediately before the mid-boss, contains a mix of both kinds.
| Destroyable | Contents | ||||||
|---|---|---|---|---|---|---|---|
| Alpha Egg Pot |
| ||||||
| Beta Egg Pot |
| ||||||
| Gamma Egg Pot |
| ||||||
 |
Delta Egg Pot |
| |||||
 |
Omega Egg Pot A |
| |||||
 |
Omega Egg Pot B |
| |||||
Quests
No quests can be found in the dungeon, but some quests found elsewhere do involve the area:
The Temple Mine quest requires collecting several key items in the dungeon. In typical order of finding, they are:
- Laser Pickaxe 1: Elevator GF, in the southwest corner
- Laser TNT 1: Elevator GF, east side on some crates
- Mining Docs 1: Elevator Control, back of the room
- Laser Pickaxe 2: Elevator B1, west side of the room
- Laser TNT 2: Old Shaft 1, trapped behind some Stone Walls
- Mining Docs 2: Control Room A, behind some crates
- Laser Pickaxe 3: Frozen Chamber 1, behind some crates
- Laser TNT 3: Frozen Shaft 2, on a high ledge
- Laser Pickaxe 4: On the high platforms in Frozen Shaft 4
- Laser Pickaxe 5: In Storage Room 4, on a crate
- Laser Pickaxe 6: In the access tunnel to Abandoned Chamber 1
- Mining Docs 3: Control Room B, hidden behind a fence
- Laser TNT 4: In Forgotten Shaft 2
- Laser TNT 5: On a small ice platform in Forgotten Shaft 4
- Laser Pickaxe 7: On a platform in Forgotten Test Chamber
The Building a Base quest requires ![]() Bug Shells, which can only be found in sufficient quantities here.
Bug Shells, which can only be found in sufficient quantities here.
Treasures
Several treasures can be found here, including the ![]() Thief's Key, needed to unlock bronze chests.
Thief's Key, needed to unlock bronze chests.

| Acc. | Type | Contains | Location | Info |
|---|---|---|---|---|
| 1 | 1 × |
Temple Chamber 2 | Complete the puzzle to spawn the chest. | |
| 2 | 3 × |
Elevator U1 | ||
| 3 | 6 × |
Old Shaft 2 | Stone Walls surround it; get a Kamikatze to bomb it or return with the Heat element | |
| 4 | 1 × |
Testing Chamber | Defeat the enemies to collect the chest. | |
| 5 | 1 × |
Old Chamber | ||
| 6 | 1 × |
Frozen Chamber 1 | Defeat the enemies to spawn the chest. | |
| 7 | 7 × |
Frozen Shaft 1 | Defeat the Fleazers hiding in Stone Walls to spawn the chest. | |
| 8 | 1 × LV19 |
Frozen Shaft 2 | ||
| 9 | 1 × |
Frozen Shaft 3 | ||
| 10 | 1 × |
Overrun Chamber | Defeat the enemies to spawn the chest. | |
| 11 | 2 × |
Overrun Chamber | ||
| 12 | 3 × |
Crossing Funnel | Blocked by Ice Walls; get the Heat element to access | |
| 13 | 2 × |
Old Shaft 1 | Get the Heat element to access | |
| 14 | 1 × |
Frozen Chamber 2 | Defeat the enemies to collect the chest. | |
| 15 | 2 × |
Frozen Chamber 2 | Get the | |
| 16 | 1 × |
Elevator GF | Get the Heat element and the | |
| 17 | 2 × |
Storage Room 1 | Get the | |
| 18 | 4 × |
Frozen Shaft 3 | Get the | |
| 19 | 1 × |
Forgotten Shaft 1 | ||
| 20 | 1 × LV25 |
Forgotten Shaft 2 | Defeat the Fleazers hiding in the Stone Walls to spawn the chest. | |
| 21 | 1 × |
Forgotten Shaft 3 | ||
| 22 | 1 × |
Forgotten Shaft 4 | ||
| 23 | 1 × |
Forgotten Shaft 5 | ||
| 24 | 1 × LV26 |
Elevator U4 | Enter on the south path from Forgotten Path 2 to access. | |
| 25 | 1 × |
Infested Chamber | Defeat the enemies to spawn the chest. |
Other Notable Information
It is possible to lose the race against Emilie if you take longer than 90 minutes.


