DON'T USE THIS: Difference between revisions
Oneiros108 (talk | contribs) (Correct stats) Tag: 2017 source edit |
m (Updated combat and strategies.) Tag: 2017 source edit |
||
| (3 intermediate revisions by 3 users not shown) | |||
| Line 1: | Line 1: | ||
{{Enemy_Card|name=DON'T USE THIS | {{Enemy_Card|name=DON'T USE THIS | ||
|sprite=File:Dont-use-this-sprite.png | |sprite=File:Dont-use-this-sprite.png | ||
| Line 23: | Line 22: | ||
}} | }} | ||
== | ==Appearance== | ||
DON'T USE THIS' main body is a flat, square-shaped platform with two arrows pointing to its center on the bottom corners and a mouth between them. On each side it has three aligned spheres that acts as its arms, the third one being bigger and acting as a hand. On top of its body there are two rectangular blocks with white eyes that have a green iris and a black pupil. These are capable of firing projectiles and, along with its mouth, show a wide variety of expressions during the fight. | |||
==Combat== | ==Combat== | ||
The boss | The boss stays mostly airborne. Its eyes are its only weak point: hitting them enough will break DON'T USE THIS, destroying its body and arms, leading to its eyes slamming against the floor. | ||
'''Phase 1''' | |||
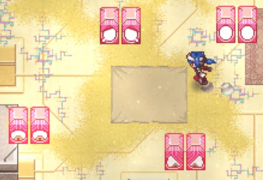
*Floats over the player, grabs its eyes and smashes the ground with them once, causing a huge shockwave and leaving them stuck to the floor for a few seconds. | |||
*Charges with a blue light and fires three [[Pengpeng]] projectiles that travel straight in the player's direction, explode on contact, and leave a trail of icicles on their path. After this it will begin taunting the player, juggling its eyes while it stays on ground level with three lines of red arrows pointing directly at it. The player can take this opportunity to climb on top of it and attack its eyes, which causes DON'T USE THIS to quickly retract and explode, hitting the player if they didn't get off it fast enough. Attacking its body with [[Melee]] attacks in any point of the fight might make it retract and fire Pengpengs without taunting. | |||
'''Phase 2''' | |||
*Charges with a purple light, gets to the left side of the player and brings out a gun. It then proceeds to fire three [[Shokat]] projectiles with a slight delay between each. They dash twice and explode on contact. | |||
*It smashes the floor with its eyes twice in quick succession, with only the final smash having a huge shockwave. When its eyes get stuck, it spawns a bunch of fake ones around itself with different expressions that explode within a short time or when hit with any attack. | |||
*Charges with a green light and shoots out two [[Young Frobbit]] projectiles that bounce thrice. They cause a [[Wave]] explosion and stop for an instant every time they hit the floor, and when they hit the floor for the third time, they explode. DON'T USE THIS taunts after this attack and still fires Pengpengs if its body is attacked. | |||
*Teleports and spawns multiple fake explosive eyes when broken. The real ones are easily noticeable since they always have the same pained expression with small tears coming out. | |||
*Doesn't fire Pengpengs unless it counter-attacks. | |||
'''Phase 3''' | |||
*Fires six Shokats instead of three. | |||
*Smashes with its eyes thrice, spawning many more pairs of eyes after getting stuck. | |||
*Charges with a blue and green light, then fires two Pengpengs and two Young Frobbits, and finally, finishes by taunting. | |||
*Doesn't fire only Frobbits anymore. | |||
==Strategies== | ==Strategies== | ||
*Applying [[File:Jolt icon.png|link=Jolt]] [[Jolt]] makes it fire Pengpengs every time it gets hit by the [[Status Conditions|Status Condition]], however, it will also fill its break meter, making it a high risk-reward option. [[File:Burn icon.png|link=Burn]] [[Burn]], even though it doesn't fill the break meter, acts as a safer option since it doesn't trigger counter-attacks and is useful for lowering the boss' health while it isn't broken. | |||
*The camera always centers in the real DON'T USE THIS when it breaks. [[Quickmenu]] can also be used to identify the real one. | |||
*Young Frobbits can fall off the arena if they are lured close to the edges. This isn't recommended as you might fall off yourself, so you it is preferable to dash away twice every time one of the Frobbits is about to hit the floor. Consider that DON'T USE THIS can block your path during this attack and make you get hit by the Frobbits and die. | |||
*Triple Pengpengs can be dodged by getting far away from the boss and dashing to the side, stopping for a brief moment after every one or two dashes to prevent them from running out. | |||
*Shokats can be dodged by dashing twice, up and down, with a specific timing. | |||
*If a player encounters the boss while below Level 58, the Wave Guard [[Combat Arts]] [[File:Pain Grip-icon.PNG|26px|link=Pain Grip]] [[Pain Grip]] and [[File:Circle of Valor-icon.PNG|26px|link=Circle of Valor]] [[Circle of Valor]] can be used to increase survivability. Timing these two Combat Arts as a counter to the series Pengpeng projectiles can allow for a cycle of reliable healing, but demands skillful dodging of the boss' other attacks. | |||
==Locations== | |||
;[[Maroon Valley]] | |||
:*Testing Finale | |||
==Gallery== | ==Gallery== | ||
<gallery mode=" | <gallery mode="packed"> | ||
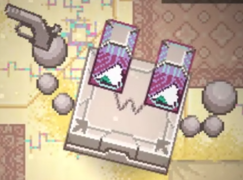
File:dontusethis-pain.png|Broken DON'T USE THIS hiding between clones of itself. | |||
File:dontusethis-pengpeng.png|The Pengpeng projectiles. | |||
File:dontusethis-frobbit.png|The Frobbit projectiles. | |||
File:dontusethis-owo.png|DON'T USE THIS holding a gun. | |||
</gallery> | </gallery> | ||
== Trivia == | == Trivia == | ||
The monster fibula report is a usage of "[https://en.wikipedia.org/wiki/Lorem_ipsum Lorem ipsum]": nonsense placeholder text derived from a corrupted version of ''De finibus bonorum et malorum'' and used to simulate the form and typeface of a final print. | *The monster fibula report is a usage of "[https://en.wikipedia.org/wiki/Lorem_ipsum Lorem ipsum]": nonsense placeholder text derived from a corrupted version of ''De finibus bonorum et malorum'' and used to simulate the form and typeface of a final print. | ||
*DON'T USE THIS' face changes to an ÒwÓ expression whenever it fires a Shokat. | |||
[[Category:Bosses]] | [[Category:Bosses]] | ||
Latest revision as of 21:52, 23 September 2022
'
DON'T USE THIS is an abstract boss in CrossWorlds. It can be encountered in Maroon Valley, as part of the quest An Unfortunate Series of Features.
 |
|---|
|
Lorem ipsum dolor sit amet, consetetur sadipscing elitr, sed diam nonumy eirmod tempor invidunt ut labore et dolore magna aliquyam erat, sed diam voluptua. At vero eos et accusam et justo duo dolores et ea rebum. Stet clita kasd gubergren, no sea takimata sanctus est Lorem ipsum dolor sit amet. Lorem ipsum dolor sit amet, consetetur sadipscing elitr, sed diam nonumy eirmod tempor invidunt ut labore et dolore magna aliquyam erat, sed diam voluptua. At vero eos et accusam et justo duo dolores et ea rebum. Stet clita kasd gubergren, no sea takimata sanctus est Lorem ipsum dolor sit amet. |
| -Monster Fibula report |
Appearance
DON'T USE THIS' main body is a flat, square-shaped platform with two arrows pointing to its center on the bottom corners and a mouth between them. On each side it has three aligned spheres that acts as its arms, the third one being bigger and acting as a hand. On top of its body there are two rectangular blocks with white eyes that have a green iris and a black pupil. These are capable of firing projectiles and, along with its mouth, show a wide variety of expressions during the fight.
Combat
The boss stays mostly airborne. Its eyes are its only weak point: hitting them enough will break DON'T USE THIS, destroying its body and arms, leading to its eyes slamming against the floor.
Phase 1
- Floats over the player, grabs its eyes and smashes the ground with them once, causing a huge shockwave and leaving them stuck to the floor for a few seconds.
- Charges with a blue light and fires three Pengpeng projectiles that travel straight in the player's direction, explode on contact, and leave a trail of icicles on their path. After this it will begin taunting the player, juggling its eyes while it stays on ground level with three lines of red arrows pointing directly at it. The player can take this opportunity to climb on top of it and attack its eyes, which causes DON'T USE THIS to quickly retract and explode, hitting the player if they didn't get off it fast enough. Attacking its body with Melee attacks in any point of the fight might make it retract and fire Pengpengs without taunting.
Phase 2
- Charges with a purple light, gets to the left side of the player and brings out a gun. It then proceeds to fire three Shokat projectiles with a slight delay between each. They dash twice and explode on contact.
- It smashes the floor with its eyes twice in quick succession, with only the final smash having a huge shockwave. When its eyes get stuck, it spawns a bunch of fake ones around itself with different expressions that explode within a short time or when hit with any attack.
- Charges with a green light and shoots out two Young Frobbit projectiles that bounce thrice. They cause a Wave explosion and stop for an instant every time they hit the floor, and when they hit the floor for the third time, they explode. DON'T USE THIS taunts after this attack and still fires Pengpengs if its body is attacked.
- Teleports and spawns multiple fake explosive eyes when broken. The real ones are easily noticeable since they always have the same pained expression with small tears coming out.
- Doesn't fire Pengpengs unless it counter-attacks.
Phase 3
- Fires six Shokats instead of three.
- Smashes with its eyes thrice, spawning many more pairs of eyes after getting stuck.
- Charges with a blue and green light, then fires two Pengpengs and two Young Frobbits, and finally, finishes by taunting.
- Doesn't fire only Frobbits anymore.
Strategies
- Applying
 Jolt makes it fire Pengpengs every time it gets hit by the Status Condition, however, it will also fill its break meter, making it a high risk-reward option.
  Burn, even though it doesn't fill the break meter, acts as a safer option since it doesn't trigger counter-attacks and is useful for lowering the boss' health while it isn't broken.
 - The camera always centers in the real DON'T USE THIS when it breaks. Quickmenu can also be used to identify the real one.
- Young Frobbits can fall off the arena if they are lured close to the edges. This isn't recommended as you might fall off yourself, so you it is preferable to dash away twice every time one of the Frobbits is about to hit the floor. Consider that DON'T USE THIS can block your path during this attack and make you get hit by the Frobbits and die.
- Triple Pengpengs can be dodged by getting far away from the boss and dashing to the side, stopping for a brief moment after every one or two dashes to prevent them from running out.
- Shokats can be dodged by dashing twice, up and down, with a specific timing.
- If a player encounters the boss while below Level 58, the Wave Guard Combat Arts
 Pain Grip and
  Circle of Valor can be used to increase survivability. Timing these two Combat Arts as a counter to the series Pengpeng projectiles can allow for a cycle of reliable healing, but demands skillful dodging of the boss' other attacks.
Locations
- Maroon Valley
-
- Testing Finale
Gallery
-
Broken DON'T USE THIS hiding between clones of itself.
-
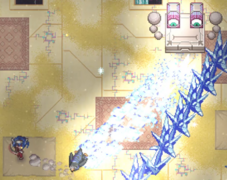
The Pengpeng projectiles.
-
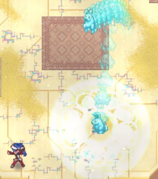
The Frobbit projectiles.
-
DON'T USE THIS holding a gun.


Trivia
- The monster fibula report is a usage of "Lorem ipsum": nonsense placeholder text derived from a corrupted version of De finibus bonorum et malorum and used to simulate the form and typeface of a final print.
- DON'T USE THIS' face changes to an ÒwÓ expression whenever it fires a Shokat.