Puzzle Elements: Difference between revisions
Jump to navigation
Jump to search
No edit summary |
No edit summary |
||
| Line 33: | Line 33: | ||
| [[File:enemy_switch.png|center]] | | [[File:enemy_switch.png|center]] | ||
| Enemy Switch | | Enemy Switch | ||
| This switch must be hit by an enemy projectile to activate. [[Miniturret]]s and Repeater Turrets are known to work with it. | | Only seen in the TechDemo. This switch must be hit by an enemy projectile to activate. [[Miniturret]]s and Repeater Turrets are known to work with it. | ||
|} | |} | ||
| Line 48: | Line 48: | ||
| [[File:blue_wall.png|center]] | | [[File:blue_wall.png|center]] | ||
| Blue Wall | | Blue Wall | ||
| A wall that can be summoned and removed. | | A wall that can be summoned and removed. In the TechDemo++, it was possible to run along the top of these, but it is unknown if this can still be done in Early Access. | ||
|- | |- | ||
| [[File:orange_wall.png|center]] | | [[File:orange_wall.png|center]] | ||
| Line 72: | Line 72: | ||
| [[File:jump_panel.png|center]] | | [[File:jump_panel.png|center]] | ||
| Jump Panel | | Jump Panel | ||
| Propels anyone standing on it to the top of the adjacent cliff. | | Propels anyone standing on it to the top of the adjacent cliff. May be activated by switches. | ||
|} | |} | ||
Revision as of 21:43, 18 July 2015
This page contains details on the interactive and puzzle features found in CrossCode.
Switches
| Name | Description | |
|---|---|---|
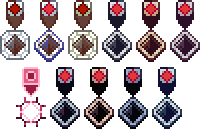 |
Switch | The basic switch. Must be hit with a Ball or Melee attack to activate. |
 |
Multi-hit Switch | This switch must be hit several times in quick succession to activate. Charged Balls are not fast enough, so it can't be activated from around a corner. |
 |
Two-position Switch | This switch has two settings, and toggles back and forth between them with each hit. |
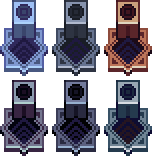 |
Bounce Switch | To activate this switch, it must be hit by a Charged Ball that has already hit all associated bounce blocks. |
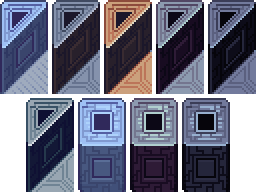 |
Bounce Block | Associated with a bounce switch. All must be hit by the same Charged Ball as the bounce switch for it to activate. |
 |
Linked Switch | Identical in appearance to the basic Switch. All Switches in the group must be hit in a short timespan in order to activate them. |
| Enemy Switch | Only seen in the TechDemo. This switch must be hit by an enemy projectile to activate. Miniturrets and Repeater Turrets are known to work with it. |
Environment Features

