Guardian Statue
'
The Guardian Statue is a mechanical boss in CrossWorlds. They are encountered several times in the Ku'lero Temple.
 |
|---|
|
This animated statue can assume all the elements the Track of the Ancients provides. Each elemental mode provides it with unique modifiers to its normal attacks. Don't be fooled by its slow movement speed as it can quickly close the gap with a quick jump. |
| -Monster Fibula report |
Appearance
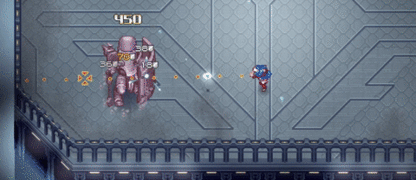
Guardian Statues are armored humanoids with cylindrical helmets and a single eye. They have a hammer that’s more akin to a claw hammer, having a round head and a triangular back, and a rectangular curved shield that they can throw and call back at will. The statue itself is always gray, but the color of its markings depends on the element it wields.
Combat
All the Guardian Statues have only two attacks that are used in the same order, however, their effects vary greatly depending on their element. Their shield blocks almost all incoming damage, so the player must break them by attacking them directly while they don’t have their shields.
Phase 1
- The statue throws its shield towards the player once, which will hit a wall and be called back by the statue when it extends its arm. The Heat shield will leave a trail of fire on its way, the Cold one leaves a trail of ice and creates icicles around itself when it hits a wall, the Shock one shoots four slightly homing lightning strikes after hitting a wall and the Wave one teleports and throws itself once more.
- Throws its shield once, then attempts to smash the player with its hammer once. The shield retains its elemental effects, while the Heat hammer simply does elemental damage, the Cold one creates icicles in front of the statue, the Shock one is used twice, and the Wave one shoots two Wave bombs into the air, with their area of effect telegraphed by big circles on the floor.
Ferro Phase
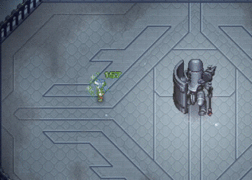
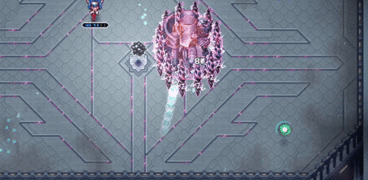
This phase is exclusive to the elemental statues. They will cover themselves with a damage-reducing barrier formed by Ferro Destructibles and will spawn a Ferro that has to be sent into them with the opposite element to break the barrier. During this phase, the statue only attacks by throwing its shield and counterattacks every time it gets hit by the Ferro, which must hit them three times (or two in the Shock statue’s case).
Phase 2
- Throws its shield, recovers it, and quickly throws it again.
- Throws its shield once, then uses its hammer twice in a row. The Heat statue only uses its hammer once, releasing a big explosion a second later, the Shock one uses its hammer three times, and the Wave one shoots three bombs instead of two.
Strategies
- Hitting the statue with the Ferro before it counterattacks prevents it from throwing its shield altogether.
- They can be inflicted with status effects such as Burn, which helps chipping away their health while they are invincible, and Jolt, which fills their break meter.
- One might instinctively attack them with their opposite element, however, none of them have elemental weaknesses. Use whatever strategies you see fit.
- Using Amber Breaker right as the statue throws its shield bypasses it and hits the statue enough times to cause it to break.
- You can ricochet Balls off the walls to hit the statue while it has its shield.
- Breaking the Shock statue during the Ferro phase might seem confusing at first. Your Ball is supposed to go through the Ferro, change its direction thanks to a Directional Ball Changer and reach a portal, causing the Ferro to go through the statue and damage its barrier.
- If you are fighting the Cold statue, keep yourself away from walls so the icicles left by the shield don’t catch you by surprise.
Location
- Ku'lero Temple
-
- Guardian of Old (Neutral x1) (non-respawning)
- Guardian of Flame (Heat x1) (non-respawning)
- Guardian of Ice (Cold x1) (non-respawning)
- Guardian of Strife (Shock x1) (non-respawning)
- Guardian of Peace (Wave x1) (non-respawning)
- The Fall (Every element x1, Neutral x2) (non-respawning)
Gallery
-
Shield throw.
-
Shield throw and hammer smash.
-
Breaking the Shock statue's barrier.


